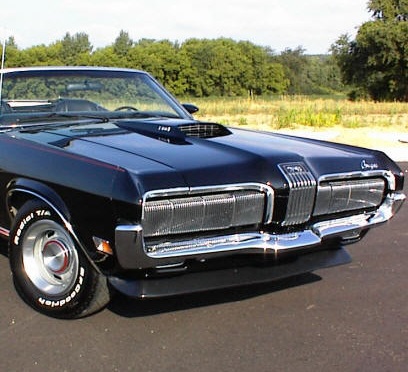
Badass Dragons of the Wasteland - Round Three

(Cougar watches the Iso Grifo drive off into the Wasteland in a spray of gravel.)

Well, damn. That’s the last thing we need.

(keys mic on the E.A.R.A.C.H.E. PA)

All right, you knuckleheads, listen up! We’re not gonna get anywhere but dead if we start chewing each other apart like everyone else in the Wasteland. You guys wanna live out your short days yelling and shooting and backstabbing everyone in sight, and never being able to sleep with both eyes closed? Go join the Orange County Raiders. The Bellflower Bastards are just up the road. So are the Artesia Arseholes. Or you can try to go it alone.

But if any of you want to see the light of a new day on a new world… if you want a chance at a fresh start… then you’d better quit sniping each other and start watching each other’s backs. We are in this together. I’m getting pretty goddamned tired of all the bitching about how much Repairs cost and whether anyone can be trusted. Well, you’re gonna have to trust each other, otherwise you can just hit the highway on your own and see how you like getting through the zombies and Raiders and tentacles without anyone’s help.

I can’t afford to lose anyone else. We can’t afford it. I’m hoping Sir Gonville cools off out there and is willing to give this another shot once he sees a few reminders of how brutal it is out there alone. If he changes his mind, well, at 300 feet in height and a maximum speed of 1 mph, I don’t believe he’ll have any trouble finding the Ark. But if he’s gone for good, then that’s our fault, and I won’t let it happen again.

Now, let’s get back to pulling. Pretty soon I’m gonna send some of you back to Stretch for re-supply, and that gives me an idea for our next Mission…

Now, somebody go bury that goddamned dog. Again. He’s smelled bad since the first time he died.

Cougar out.

2 Likes

Gonville De’Ath : Mood : Tetchy

I am just going for a drive and may be some time.

8 Likes

Bloody hell. Don’t make those famous last words Sir G.

112 years ago. He would’ve done a good job in the SOE.

2 Likes

Well color me relieved. Not the shittin’ kind of relieved neither.
Y’all are much nicer than anyone gives you credit for I can tell you that! It brings wet to my eyes that’s how nice it is. I hope I have the pleasure of having your back during this mission somewhere bubba, (@bizmail_public) Desmond (@SteampunkBanana) and Mike (@kingannoy). Growin up around these here parts since the world has gone and gotten turned over and shat on, you just dont grow used to a supportive word like that. You say thankya if you aint got murdered in your sleep by some stranger, or worse!
We aint no word-makers or nuffin like that no more but that was some pootry to my ears sirs. Thanks.

Now let’s get this shit on the road. Ima need 9HP to get to full again, which comes round on 8LP over at Stretch’s if I aint mistaking (4LP for the kit and 4LP for the HPs).

That leaves me with 4LP to spare. Let me know who needs them cause I’m willing to share.

2 Likes

Don’t wheel & deal too much, yet. Stretch’s price list is somewhat… volatile.

2 Likes

I’m always just around the 75% range, doesn’t that put me at Stretch’s mercy, regardless of whether I want to be?

Yeah… but you don’t know yet how much he’ll cost. You will soon.

1 Like

I hear Stretch now accepting payment in kidneys.

3 Likes

Watching Sir Gonville De’Ath’s dust cloud on the horizon, the little Pibble starts to howl, and Howl, and HOWL…

When yer right, yer right Babygirl…

keys mic on the TCB:

BREAK 1-9 BREAK 1-9, this here’s the BUM, me and Babygirl cant let Sir Gon leave while he’s still damaged… We’re going out to repair him, if’n we git killd out there… Well so far its been real good working this job with y’all…

Clank take these 3LPs for our fallen comrades. Cougar give these 2LPs to Stretch when he reopens shop, tell him I took a repair kit.

BBUM OUT

Drives off into the sunset after Sir Gonville…

5 Likes

I found an old dvd in Perky’s glovebox; apparently one of her relatives enjoying a spin at Le Mans.

Are we sure there are no police on the roads? Because every time I fire this bloody thing up, I’m going to be driving intoxicated. You can borrow my headphones if you like.

That now, is a talkative engine.

She could do with some beefing up, mind.

5 Likes

Fuck the 8-track, that’s engine music.

3 Likes

Round Three - Mission One - The Junkyard Raid

Stretch is an asshole of a mechanic-bot, but it’s not really his fault. He was built and programmed by a guy named Fleetwood, a gentleman of my acquaintance that you shouldn’t regret not knowing. Before the war, Fleetwood was a junk dealer who made it big, owning a chain of scrapyards all the way up the 605 and 5 freeways to the Valley and beyond. The only thing admirable about the man was his taste in music; otherwise, he was a money-grubbing, underhanded, double-dealing, and (some say) murderous bastard.

The War changed all that. Now, Fleetwood is a megalomaniacal, shameless, confiscatory, and (everyone says) mass-murderous bastard. Before he moved his base of operations to North Hollywood, he built and programmed mechanic-bots like Stretch to run his chain of junkyards for him. Fleetwood doesn’t tolerate competition (as you might have guessed), but right now, we can’t tolerate the way he does business. I say we take out Stretch and pillage his scrapyard for all the spare parts we can carry (and Marion can carry a lot).

But this is no run-‘n’-gun mission. Stretch’s yard is far too well-defended for a frontal assault. Subterfuge, ingenuity, and literacy are the keys here.

This is a job for Mechanics Only. Two groups. One group (the SPeedier ones) drives fast circles around the junkyard, going extra-fast around the back, and slightly slower around the front. They should tease and dodge until the machine-gun nests in the front are activated and take shots at them. The second group (highest in EN and LK) must hack into Stretch’s back door next to the loading dock. The longer it takes them to hack the door, the more likely one of the SPeedies will catch bullets. Each failed hack attempt results in an electrical shock that will hurt quite a bit.

Once the door is open, all the squadmates assemble at the loading dock to face Stretch’s junkyard dog. He looks a bit like Rex, but amazingly, he has no cybernetic implants yet. Fido is an uncharacteristically cautious junkyard dog, not stereotypical in the least. Oh, he can fight and bite with the meanest of ‘em, but he possesses an orderly, somewhat bureaucratic mindset that refuses to be proactive without explicit instructions.

He sits, head cocked askew, as if waiting for direction. Behind him, on the wall of the loading dock, are several commands in various languages. Our Mechanics can read, and their LK determines if they choose the right language to deliver the desired command. The three languages are Farsi, Tagalog, and Klingon. The seven commands listed are, in English, SIT, STAY, DOWN, ROLL OVER, PLAY DEAD, SHAKE, and KILL. Behind the dog, Stretch reclines, plugged into his charging port. Each Mechanic must choose a language and a command, and hope their LK and instinct serve them well. Mechanics will take turns in a random sequence, and the first Mechanic to give Fido the “correct” command in the correct language will receive a 10LP bonus. If no Mechanic chooses the right combination by the time all Mechanics have exhausted their commands, or if a Mechanic issues the, uh, wrongest command, Fido will attack and Stretch will wake, and certain security measures will come into play… but nothing a well-coordinated and properly-prepared squad of mechanics couldn’t handle. I hope.

Success of this mission results in unlimited Parts for all Mechanics, with no “DRM” about how they’re used or sold.

On the Mission Entry Form, if you choose Mission One, you should write the three languages in the order you want to attempt them. Similarly, you should rank the seven commands in the order you will want to give them. You and the other Mission One players will take turns. On your turn, the first command on your list will be given in the first language. There will be an effect, which you will discover in the Results. If this effect does not result in a Round-ending outcome such as Fido self-destructing, Stretch being killed, or all you Mechanics being attacked by mechanical spiders or some such, then the next Mechanic gets a turn. If you get a second turn, the second command on your list will be spoken in the second language. And so on, until a Round-ending event takes place.

Everyone might survive this virtually unscathed, particularly if someone guesses right the first time. But also, there might be a fair amount of damage dealt before the Round ends. Upgrade your stats wisely in advance! At the moment, Stretch has no idea what we have in mind!

Risks:
High SP group:
Machine gun turrets cause 1 HP damage per hit. There are 20 turrets. Each hit randomly assigned to players in this group, with the number of hits determined by the failed hack attempts of the second group.

These turrets are vulnerable to two things - armor-piercing shells, and certain types of oxygen-rich explosions. Any player with that sort of weaponry will get a dice roll (1-6) multiplied by their LK stat divided by 6 to determine how many turrets are destroyed. They’ll only get one shot, because the turrets will adapt their defenses.

High EN group:
Each Driver takes a turn at hacking the back door. You and the door both roll a many-sided die (1-25), and a match is a successful hack. However, it’s not quite that simple - your EN stat provides a massive advantage. For each EN point above our group’s average, one side of both dice falls off. (These things happen in the postapocalypse…)

A failed attempt gives some encouragement to the turret aiming systems, and the SP group receives one hit for each intact turret. It also provides an electric shock causing up to 5 HP of damage (depending on AR and LK and a 5-sided die roll) to just the Driver making the attempt.

There are five digits in the door code, so five successful hack attempts are required.

Payroll:
Unlimited Parts for all upon successful completion. 15LP for all participants upon successful completion. 10LP bonus for successfully commanding Fido. 1LP per machine-gun turret destroyed. 1LP per door code digit hacked.

3 Likes

Mission 2

We need to “liberate” the ammunition stored in a concealed bunker at the Naval Weapons Station. If we don’t, we’ll have trouble later - all reports that have come to me indicate ammunition is scarce out in the wasteland (APCs love lead and brass), and usually when an enemy is destroyed any ammunition it had is ruined. Our previous raid on the navy base alerted a lot of guardbots, flame carts, training turrets, and autonomous pursuit Jeeps (that’s what those .50 Cals seem to be from - and they will be angry if they see us with them). Also, a Minecart has been going around setting mines.

Fortunately for us, word of our last raid got out quickly, and low-life raiders have swarmed upon the base. It’s utter chaos, and for the most part the guards won’t pay attention to us if we’re smart. This is going to be another slightly complicated mission.

We need to get in relatively unnoticed. While the guards are fighting the raiders, we will slip through and get to the bunker (which is still concealed). Then, we need to distract any guards or raiders away from the bunker as we hack our way in. Finally, we sneak out with the haul. Easy.

To do this, we’ll need Drivers with different skills. Choose what suits you best.

2Aa: We’ll need Drivers with high SP and MV to distract would-be attackers. These Drivers will keep the bad guys off of everyone else. You will need to fight 1-2 Autonomous Jeeps at 25 HP, 40 FP, 20 AR (+10 FP due to their anger if you have a stolen .50 Cal from last round), and 50% chance each of 4 Raiders at 20 HP, 30-40 FP, and 15 AR. These enemies have relatively high FP but very low SP and MV, so your high SP and MV will allow you to run circles around them without getting hit - and high MV will let you lead the enemies right on top of the land mines. This is an option for specialists in speed and maneuverability.

2Ab: Rather than distracting attackers, Drivers with high FP and AR may wish to engage them directly to rack up their kill count. This will attract more to you than option A. SP, MV, and LK determine how many Jeeps and Raiders (between 5 and 10), with the same stats as above. 50/50 chance of being drawn into either the Proving Grounds or the Firing Range, where unexploded ordinance and target practice drones pose an additional threat - high EN may allow you to use these to your advantage against the enemies, but high AR will keep you safe. This option is for specialists in weapons and shooting.

2B: We need Drivers with high EN to repair the loading elevators in the bunker, which are broken. We’ll need all the elevators operational to get everything out in a reasonable amount of time, so the more the better. There are 10 elevators to hack, split among Drivers who choose this option. You and the door both roll a many-sided die (1-25), and a match is a successful hack. Also, you will be PM’d a puzzle to solve. However, it’s not quite that simple - your EN stat provides a massive advantage. For each EN point above our group’s average, one side of both dice falls off. If the puzzles are answered correctly, more sides will probably fall off too.

If your EN is not high enough, and/or if you get the puzzle wrong, you will receive electric shocks for each failed hack attempt. Most likely, you will receive an electric shock anyway. They are not as strong as the ones at Stretch’s junkyard, but you might receive more of them. AR will help prevent damage (providing extra Faraday cage type shielding). But you’ll also need a lot of LK. Red wire or blue wire? Even if you’re literate, it’s a gamble (unless you have a lot of LK). If you get shocked, the electromagnetic activity (remember, ever since the EMP blasts this is quite rare) will attract Screamers, who may end up spoiling all of the ammo, not to mention eat you. So, try not to get shocked. For EN specialists only!

2C: We need Drivers with high TQ to either carry (if they have cargo space) or drag the stash out. These Drivers would do well to have high EN as well, to ward off the APCs which will be attracted to the ammunition. High SP and high TQ may be enough to outrun the APC swarm, though it won’t be enough to outrun the Screamers. Having decent FP will help there, but hopefully some of the other Drivers can protect you as well. An option for TQ specialists, with either SP or EN minors.

I need at least three Drivers. One in option A (either Aa or Ab), one in option B, and one in option C. More would be better.

To escape unscathed, when I say you need a high stat I mean you need not only higher stat points than most other Drivers, but you likely need to max out on upgrades in that stat as well. Otherwise, you’re taking a risk. Well, you’re taking a risk anyway. But remember, this is a difficult raid and I need specialists.

Ideally, this is a quick-in quick-out operation. I saw enough heist movies before the war to know that’s rarely how it works out, though.

These are the risks to all Drivers, in addition to those listed above:

  • APC Infestation (SP and TQ dependent)
  • Screamers, on the way out - probably about 2 per Driver. Drivers with very high FP and EN may be able to protect everyone, but no guarantees.
  • Road Mines - 25 mines (each) with a ~2% - 5% chance (each) of you hitting them, depending on MV and LK. If you led any Raiders or Jeeps onto mines, the number we have to worry about decreases. Having decent AR will help with damage. I suspect these may be anti-personnel mines and not actually anti-vehicle mines - so, roll up your windows, and window bars will help.

Payout:

Besides unlimited ammo (which you’ll be sharing with everyone else, so I know it’s not that enticing), we’ll also pick up as many +5 FP .50 cals as we can from Jeeps we destroy (along with their license plates), raid the fuel tank of the generator that keeps the lights in the ammo bunker on (fill your tanks for free), and grab any license plates from other fallen Jeeps and Raiders we may come across (at least 5-10 LPs per Driver) - nobody else will be scavenging for those yet since the battle will still be raging all around.

So - who’s with me?

3 Likes

Round Three - Mission Three - Demolition Derby

The Road ahead is neither smooth, nor straight, nor friendly, nor picturesque. Many hostile entities and obstacles lurk in our path, but the only one we can predict with any surety whatsoever is this:

The overpass.

A number of them lie ahead, some already collapsed by the bombs, many teetering on the edge of ruin, but several are nearly as stout as the day they were built. One of the most formidable stands where the 605 interstate passes underneath California Highway 91. The Artesia Freeway is more than a dozen lanes wide at that point, and they all need to come down and be cleared away. The clearance is a mere fourteen feet six inches, and the Ark is… well, taller than that, and letting a bit of air out of the tires won’t help matters this time.

One might ask why we don’t go around? A fair question, for those who’ve never faced off against the Orange County Raiders. They’re not one team, they’re two: the Bellflower Bastards to the west, and the Artesia Arseholes to the east. The 605 is the border, the no-man’s-land between their little empires of squalor, violence, and death. Driving up this freeway is dangerous. Leaving the freeway anywhere near their turf is suicide.

We’ll need some heavy lifting and heavy shooting for this Mission. At least one Mule, preferably two or more, to knock down and remove bridge rubble. The noise will attract Raiders, who will arrive in vehicles much like your own: SHITGO-equipped and heavily armed, though not so well-armored. But their numbers are not few. We’ll need Escorts to help with demolition shots, and to help protect the Mules when the Raiders arrive. LucK will be beneficial, and you’ll need all the FirePower and ARmor you can buy. Escorts should try to boost their SP and MV up to Scout levels (and indeed, Scouts are welcome to join, if they think their FP and AR are up to the task). All Raiders killed will give the killer 2LP apiece, every Bridge Lane destroyed will give the destroyer Structural Rubble worth 1LP each.

Keep in mind the inclement weather. Ha! “Inclement.” It’s raining buckets of toxic cats & dogs. Visibility is poor, the roads are soaked, and everyone’s SP and MV will take a hit. Upgrade accordingly!

Take out as many bridge overpasses as you can. On this Mission, we’ll attempt 16 overpass lanes before we head back to the Ark.

Risks:

Overpasses: Each lane equivalent to a vehicle with 10 HP and 50 AR (but 0 FP, obviously). It’ll take some doing to get them down. Heavy weapons and explosives will be useful.

Raiders: They watch the no-man’s-land of the freeway carefully and will see you approaching, so there’s no avoiding them. But they are relatively cautious, and won’t risk a full assault on Drivers they aren’t familiar with. Still, reports indicate that they usually will send out two vehicles per intruder. A coin flip per Driver will decide whether one or two Raiders come out. Their stats are about equivalent to your average Round 2 results stats, so you had better get those upgrades ready! Escorts (and Scouts, if any) will fight all Raiders, but Mules on demolition duty are not completely out of danger. The Raiders may approach from the overpass and try to knock rubble on you. If you can stretch your plates, you may want to upgrade the armor on your roof.

Payroll:
All Raiders killed will give the killer 2LP apiece, every Bridge Lane destroyed will give the destroyer Structural Rubble worth 1LP each. Demolition also yields a random number of plates suitable for addition to Armor at +2AR each. All Drivers will be eligible to pick these up when they randomly fall.

Map courtesy of Jane:

EDIT - (added map 5:43 PM PST 2/04)

2 Likes

Mumbles… Hrmph. Great. I gotta deal with you lot again.

Boy, do you lot look like hell. What’d you go and get yourselves into?

Seein’ as how you all seem to need 'em, I’m thinking that I could charge a bit more for repair kits. They’re 8 LP now, and my repair services just went up too. 1 HP per LP, and no more.

I got some new parts out back though, which ain’t too expensive. I got a bunch of parts cars, which I stripped down since you been here last. I got plenty of quality parts off of 'em, which I could use to overhaul your vehicles. I figger that for 8 LP, I could get your ride up by +12 EN points.

I don’t know if you noticed this damn weather, but this downpour ain’t gonna help your traction any. However, I can get you some wet weather tires for 6 LP. This oughta boost your ride up by +8 MV when it’s raining, or just on wet ground. Might be a smart buy.

I also got some high-speed gearboxes and some close-ratio ones. Obviously, you can’t have both, so you can give me 10 LP for either +15 SP or +15 MV.

Now, to get more luck, you gotta be lucky. I got a bunch of cannibal toes, which are supposed to be good luck for some reason. Anyway, I been collecting 'em, so let’s make this interesting. You just have to give me 2 LP, and you’ll get +0 to +5 LK apiece. You can do this up to 5 times, or one cannibal foot worth of toes.

3 Likes

Keep an eye peeled for the Round Three Entry Form, which is being fine-tuned as we speak. It will have space for all kinds of things: Mission choices, shopping selections, language and command preferences… read and select carefully!

EDIT - okay, here it is!

1 Like

For those who’s brains work like mine and immediately wondered about this the group average for EN is 22.6

So Clank if you go on that mission your dye will only have one side, you should get it on the first try.

2 Likes

Ok, here’s the Round 3 Form:
https://docs.google.com/forms/d/1GUJcOI9tS8TveMFccCABRSVlqfIUcuCk_2RLwTfgt9U/viewform

Please use this to make mission, repair, and upgrade choices!

1 Like

Hey everybody. Got an announcement from Cougar and me.

She and I really appreciate what you all have done so far, and the hell we’re still about to experience together. Some of you here have already made a terrible sacrifice with the loss of your vehicles. Cougar and I can’t imagine how painful that must have been. The fact that such a sacrifice was made in the service of our missions cannot go unrecognized. These three Drivers have already lost their beloved cars, and their hard-won upgrades went up in smoke as well. We cannot in conscience award the Round 2 bonus upgrades to those who could not successfully complete those missions, for there must remain some strong incentive to stay alive and see the job done, above and beyond the fond regard for one’s own skin… and wheels. But we’re not cold and ruthless bastards. The full combat pay of 25LP will go to those three whose rides perished in the Round 2 missions.

And this policy will continue, as long as the overall goals of future missions are accomplished. All participants in those successful missions will receive the full LP due, whether their ride survives the mission or not. Bonus upgrades and scavenged loot will continue to be awarded only to those who survive.

Your hat-passing to provide for the bereft has been noted. May the… the humanity of that sort of action be a sign that we gathered here actually deserve to survive the death of this world.

7 Likes

That’s a beautiful gesture folks but I think we would all be better served if you kept the LPs and used them to pay Stretch off for those repair kits.

Took a knock to the head and I can’t read anymore but for some reason numbers are making a bit more sense.

The way I figure it each of us who got wrecked are out 14LP tops (the most LP a mechanic could have used to upgrade last round). Not having to buy those repair kits (because we got new rides) saves us each 8LP, and most of you folks are going to need at least 6LP to get topped off (especially at 1LP per HP from Stetch). Now sure we missed out on a few goodies from the last round so I guess the folks who made it out in one piece are better off, but speaking for myself, I would rather you folks used those LPs to get your rides back up to snuff and upgraded for the next missions.

Although Junior, I understand you can’t use that armor anymore. My new ride is a little weak on AR. I don’t need the charity but how much would you sell it for?

2 Likes