Took me a minute…
7 Likes
Still the best thread on BoingBoing. Love you guys!
5 Likes
Boychild just made this one for a class project (I helped with the 3D-printed facemask part). I think the kid may have a future as an armorer!

23 Likes
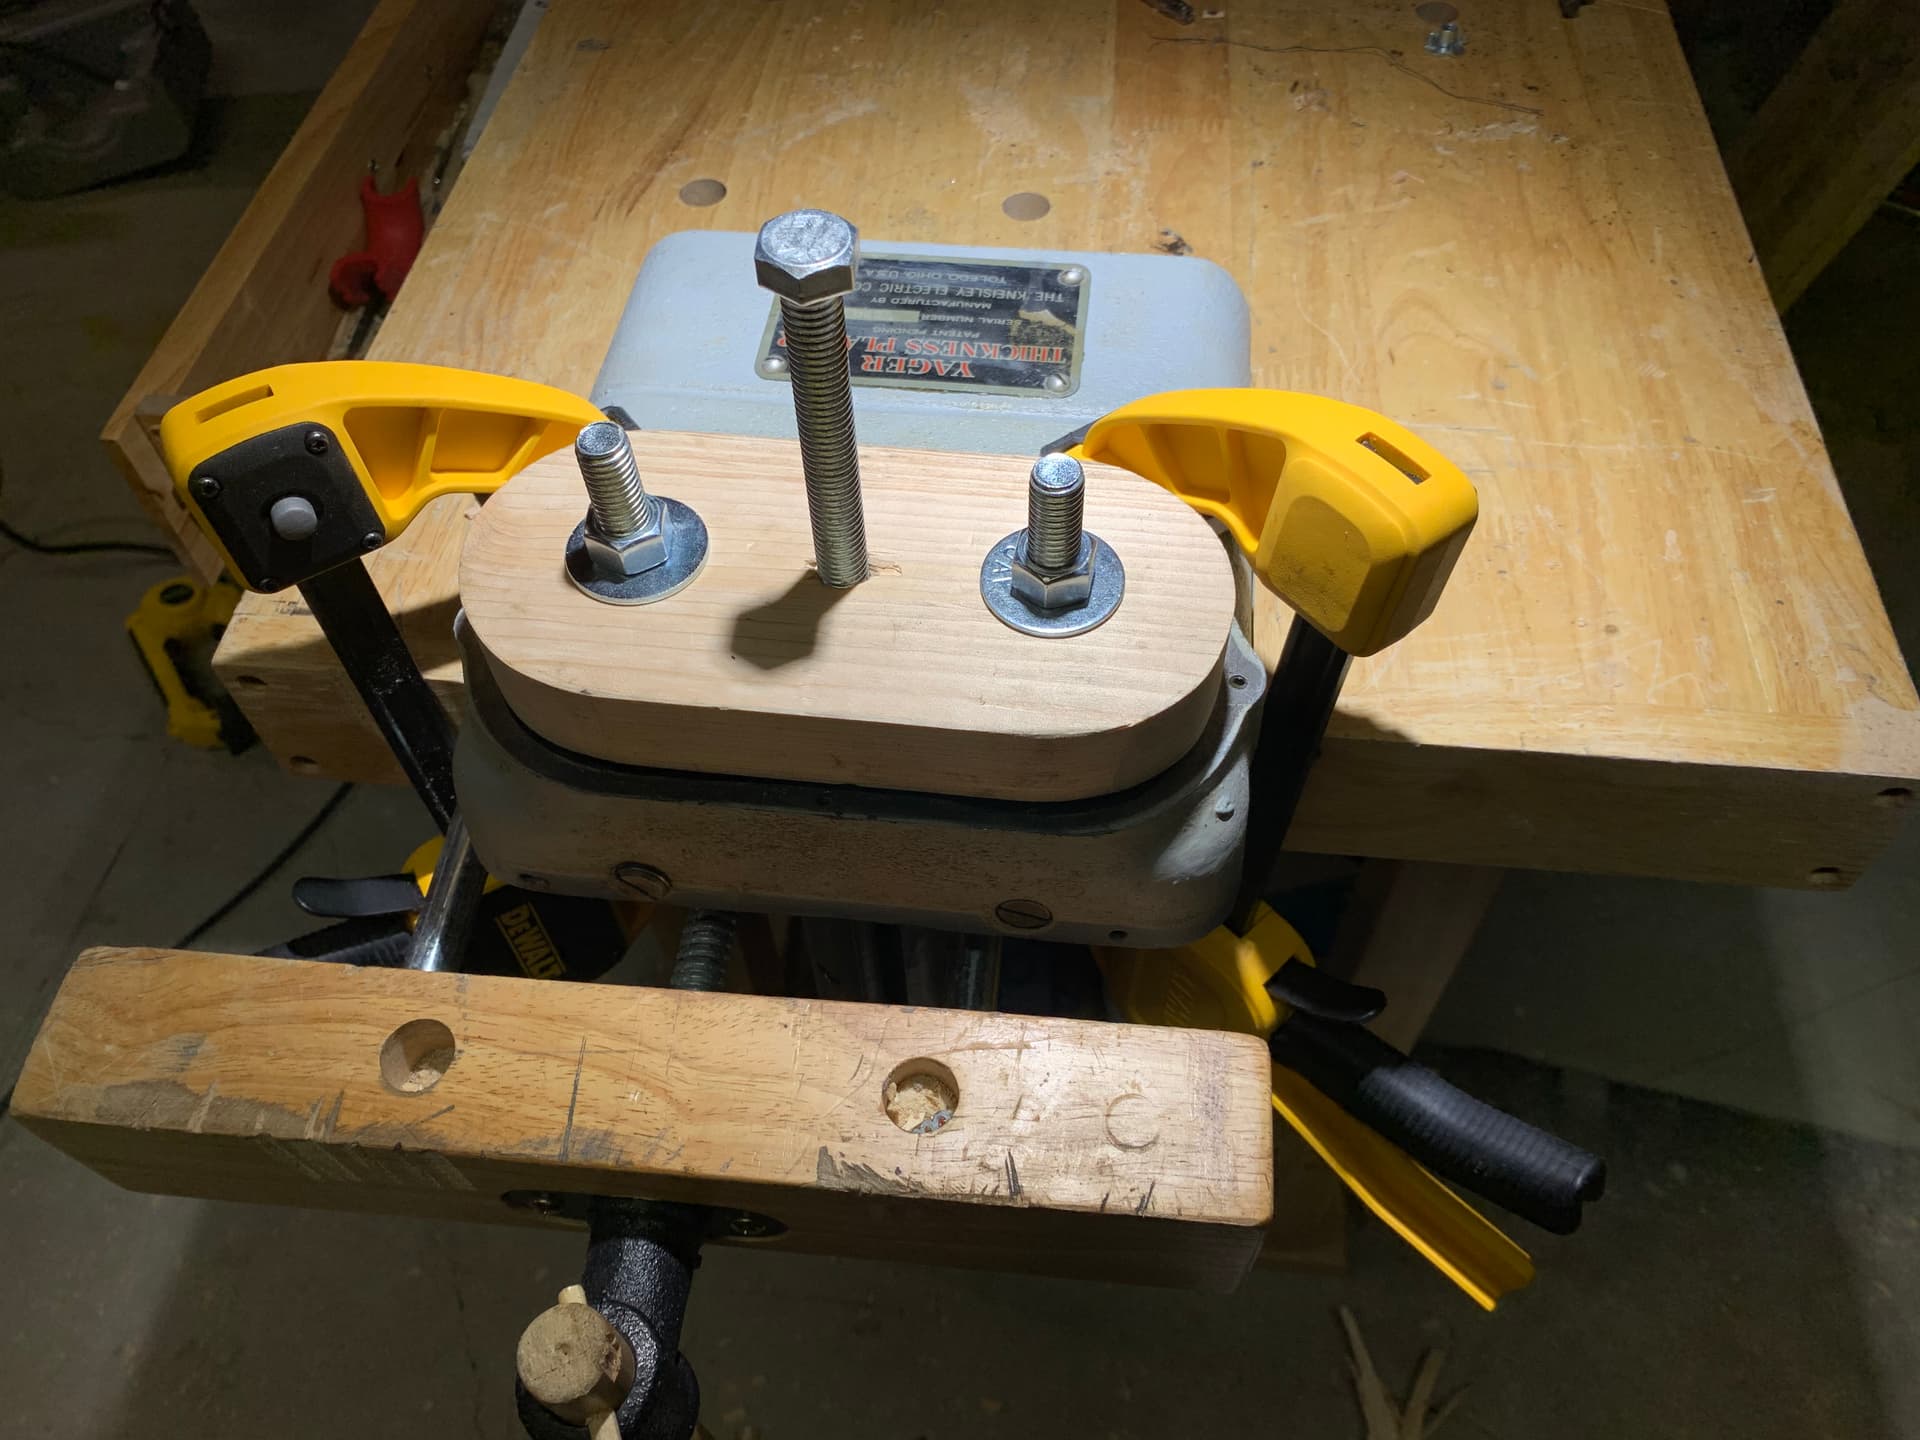
I picked up an old thickness planer on Craig’s List for “please just get it out of my garage” money:

It was clear right away that it had seen some stuff - the outfeed roller (that yellow crunchy thing at the top of the pic) needed recoating or replacing and a couple of the lock screws on the cutter head were stripped:

But overall, not too bad. There isn’t that much that can go wrong with the the drive or the table adjustment, and the cast iron’s in decent shape, mostly.

50 years is a long time though, and some of the components weren’t going to come apart without a fight. I had to make a fixture to push the cutterhead bearings out of their housings:
Perseverance won out.

The feed rollers sat in bronze bushings that need to be replaced and that all came apart readily. The outfeed roller, once I removed the old urethane, was a weird affair, welded out of a piece of pipe and two stub ends. I decided to replace the whole thing with a new part.
Cutting the shaft ends:

Knurling the body so the urethane would have some tooth to hold on to:

Here’s the old part and its replacement:

For the urethane, I made a mold out of stainless tube and aluminum billet:


I had intended to use a large syringe to fill the mold, but the viscosity of the urethane was way too high. A caulking gun wound up being the right solution, filled from the bottom to force all the air out of the mold through the top vent.

(I have no idea how I took that picture.)
It took a couple tries to get a usable part. I degassed the urethane before casting, but I think I might have had an easier time if I had connected the vacuum pump to the upper vent and pulled the rubber into the mold. 20/20 hindsight I guess. I was pretty pleased with the finished roller in any case:

While I was waiting for the urethane to set up, I went to work on the cutterhead. This was… not fun. The hexes in socket head screws are broached and broaching work hardens the material. drilling out a stripped screw can be a real pain in the ass. After ruining two high speed steel bits (I’m not just stubborn , I’m stupid too), I hit on a workable solution- Home Depot sells carbide-tipped masonry bits for cheap. I was able to drill out the body of the screw with one of those, then clean out the remainder with a tap.

Or that was the plan anyway, right up until I broke off the tap. I managed to get the broken piece out with an extractor, but there was no salvaging the hole. I drilled it out oversize and will have to sleeve it and put in a helicoil.
There was a lot of surface damage on the cutter head that I wanted to clean up and that led me up a steep learning curve on shear cutting in mild steel. Ultimately, the head cleaned up pretty nicely, despite steel that acted like it was alloyed with putty and cuts that were interrupted in multiple places. To those of you interested in such things, I recommend the youtube channel https://www.youtube.com/@mrpete222. Mr. Pete (he goes by tubal cain) has a ton of content that’s invaluable to amateurs like me.

And that’s where things stand. I got distracted by other things (making shop furniture, trying again to teach myself to paint) and haven’t gone back to the thickness planer in a while. Maybe I’ll try to close it out when it’s warm enough to work out in the barn again.
23 Likes
Fantastic job on that roller - is the weight roughly equivalent to the original, or did it end up much heavier?
When I read you’d drilled out a hardened bolt with a masonry bit I caught myself wincing reflexively, from imagining the godawful noise that must have made ![]()
7 Likes
sweet. the first shop I worked in did a ton of custom thickness planning. catching the board as it left the initial roller and all the weight transferred to the just the plane and final roller wanted to leave a mark every time. even if you did it “right”, you could see one if you looked hard enough. at least on our machine. super cool machines but that always annoyed me. of course, the sensible thing would be to plane a board longer than you need and cut the end to length but my boss didn’t see it that way.
that’s a huge project but you got a great piece of kit out of it. did you have a sharpen the blades with a file or how did that go?
5 Likes
It’s definitely heavier, given that the original is hollow. Hard to say by how much since the original urethane was dried out and damaged. Between the pulley system and a steep ratio in the feed gear train, I don’t think a modest increase in weight will have much of an impact on reflected inertia.
Drilling out the screw was slow and unpleasant until I was past what remained of the socket. that first 1/4” actually cost me a drill bit since carbide doesn’t handle shocks gracefully. Definitely not the recommended method, but somewhat cheaper than buying a carbide endmill. Quicker too, on a Sunday when the nearest MSC direct outlet is closed.
7 Likes
That’s what I do - I rebuilt an old 6" Jet jointer, one of the massive cast iron jobs, and instead of spending 100+ hours tuning it to get rid of the end snipe, I just add an extra 2½" to the measurements and cut the ends off after planing ![]()
5 Likes
Snipes are the bane of every woodworker with a budget which is all of us, probably. It helps to have a long outfeed table or roller assembly. Like @Medievalist, I wait to cut my stock to length until after it’s dimensioned. I’ve tried to adjust out the snipes and the roller witness marks, never with any appreciable degree of success. I always have to clean up after dimensioning with a card scraper.
Jury’s still out on the tool. Though it looks nice in boxes upstairs. I have a 12” Powermatic model 100 planer (another Craig’s list buy) that’s my workhorse.
I have two sets of blades for the jointer and planer, a set that I use for questionable lumber (previously used stuff, pallets, etc.) and a good set for clean hardwood. I sharpen the rough set the same way I sharpen my drawknives, with the blade clamped and a wide diamond hone used like a file. The good set I have sharpened professionally at a local place. $10/edge is pretty cheap when your shop volume is low. One of my projects for this year is to design a better blade setting tool that will reference the planer bed rather than the cutter head for better finish and quicker changeouts.
6 Likes
Follow up to the embroidery/quilting project. The quilting is now underway. My squares are in there somewhere.


19 Likes
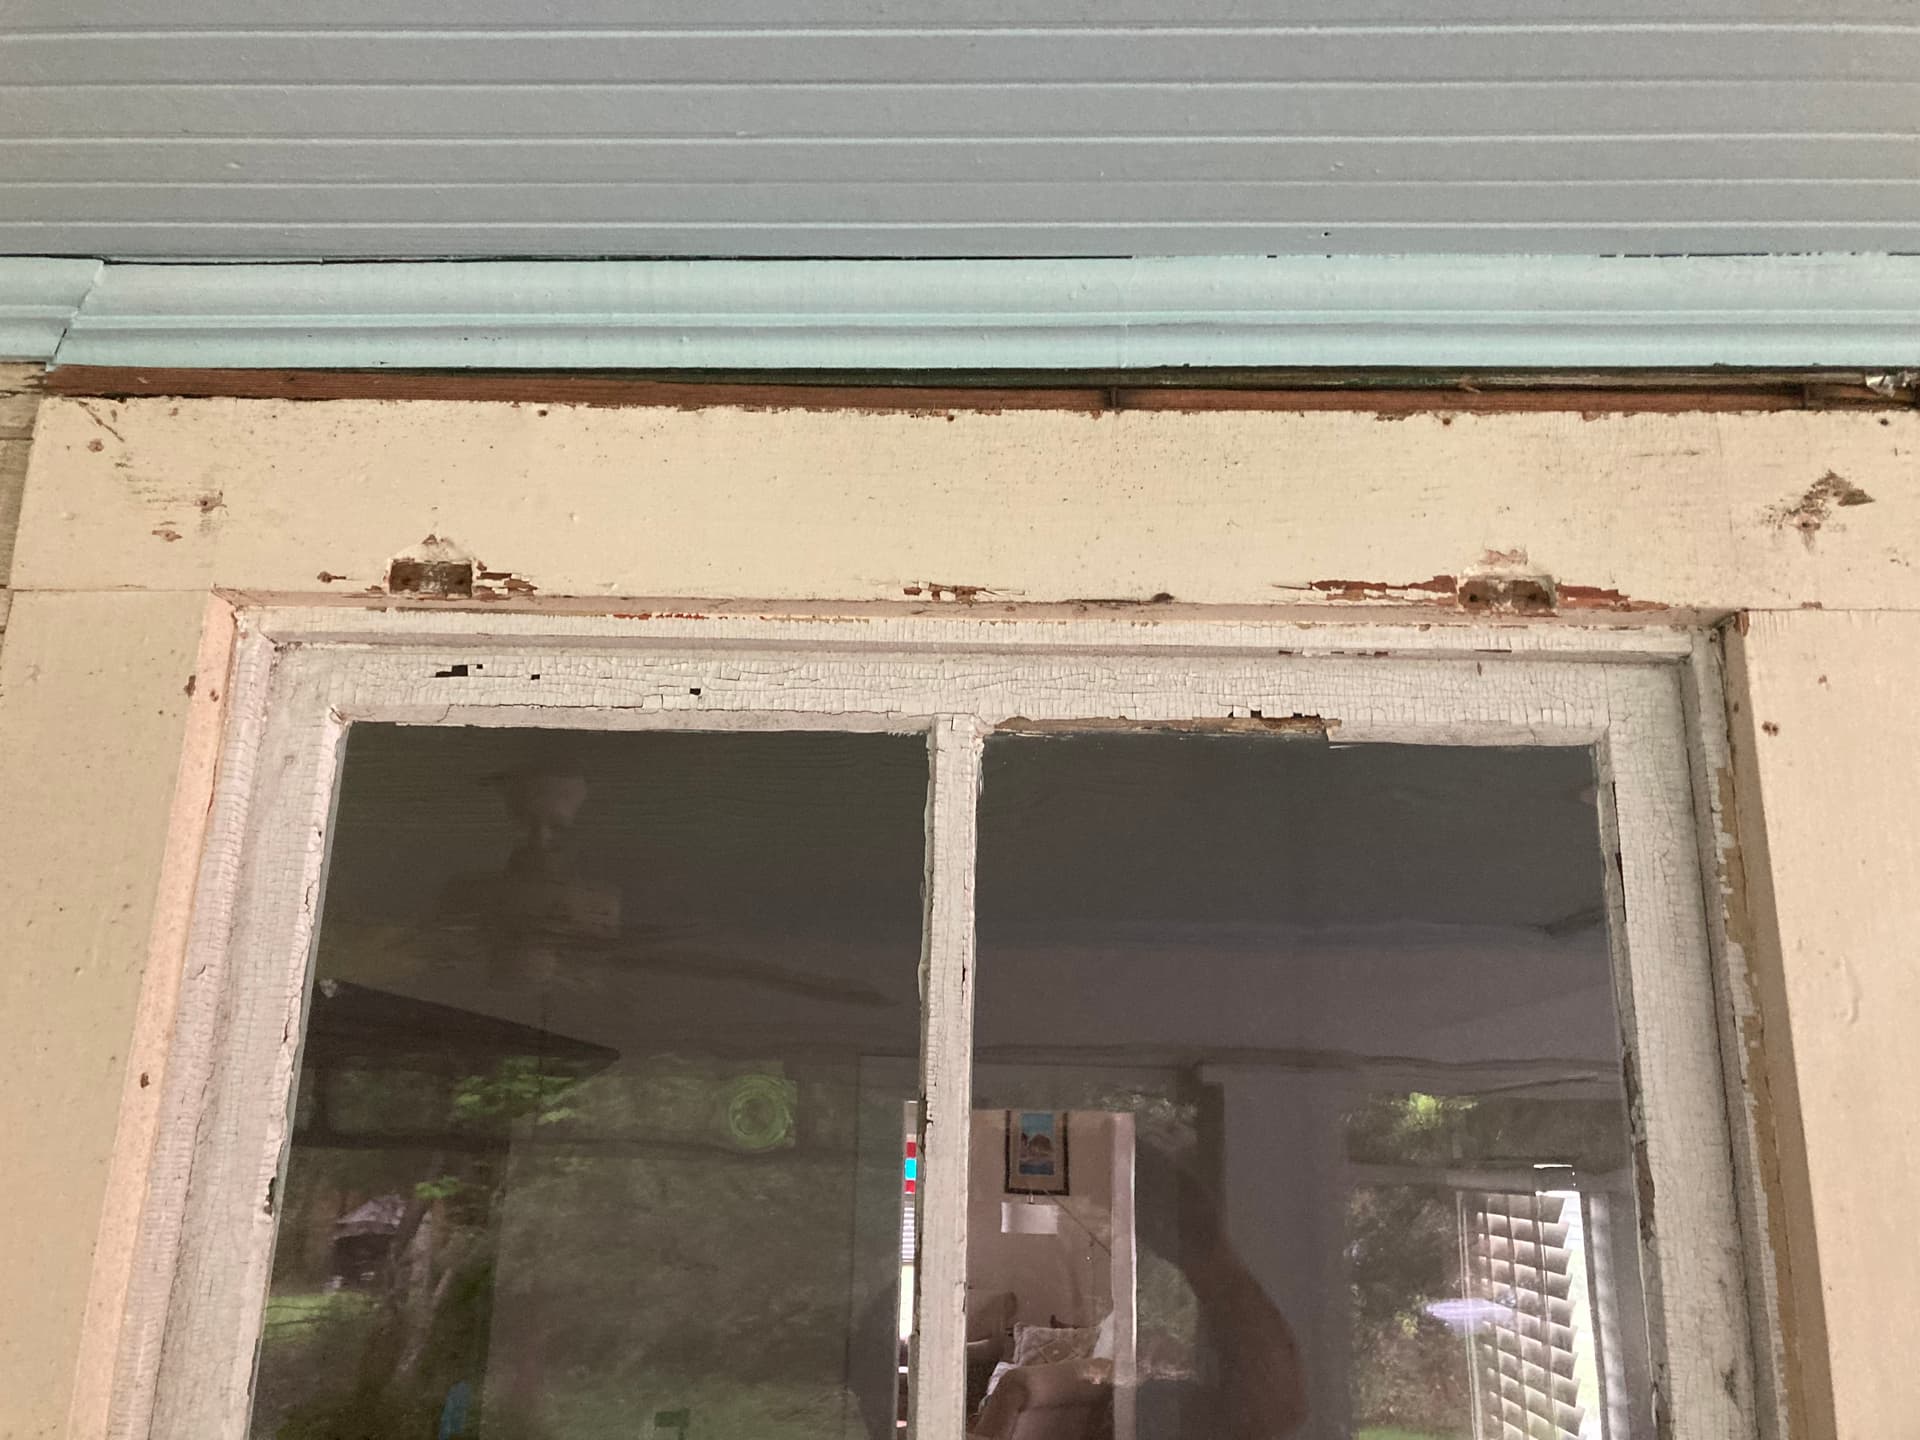
A small thing, but after 2.5 years in this old house, I finally managed to get this window open. I’ve been prying and shimmying, and slicing and shiving, and tapping and generally harassing the thing. Yesterday was the last attempt. If I didn’t get it open I was going to take the window frame apart. I don’t know when this window was last opened, but I’m going to guess it’s been many decades. The number of different color flakes that rained out of the casing is a nice history of the repaintings, but most of the non-white/cream colors were no doubt lead.

Anyway, it opens! No screen. The other side had a storm shutter when it was built. As far as I can tell it was never screened. The screen porch outside the window came much much later.
The outside, top, with the “haint blue” ceiling (that was green in the early 20th century):
Close-up of the old shutter mounts:


15 Likes
is this the kind with the pulleys and counterweights inside the wall? a really nice feature that works probably a few decades before they get stuck and fail spectacularly, making one more thing you have to fuck with to get them working again (cutting the ropes at the top by the pulley is your only real option unless you want to pull the frame out and actually restore them)
5 Likes
I used to be a glazier in a former life. It’s not terribly hard if you are okay with restoration.
11 Likes
I still say there’s a solution involving concrete somewhere.
2 Likes
Yep–old school. Big (lead?) weights in the wall, on rope pulleys. Those were a bit sticky, but it was the decades of paint that was holding it. At one point when I was levering one side I heard a “snap” that, after determining that it wasn’t the glass, was probably one of the last big lines of paint holding the window in place. It still doesn’t open perfectly, but it opens.
I’ll likely have to take the sash apart anyway. The windows themselves are so chewed up that they’ll need a good sanding and stripping to put them back right.
@knoxblox Thanks for that link!
8 Likes
The sash weights I’ve encountered have usually been low quality cast iron. The lead ones are the $$$ fancy because they are smaller and quieter.
The old cotton braided ropes are super quiet, but won’t last long, especially if they get paint on them. People used to replace them with brass chain, which I’ve never seen wear out, but it’s very noisy. In my opinion the best replacement is nylon rope, because you can get it in the same diameter and braid as the original cotton to preserve the look and quiet operation, but it will last 50 years (or longer, if there is no UV light striking it). If you decide to use nylon, make it as short as you can, because it will stretch a lot over time.
3 Likes


4 Likes
If you end up taking the window apart and you don’t want to deal with they pulleys the make spring balances.
I’ve seen them do this on This Old house in a few episodes.
I can’t find this particular video on YouTube but he makes the install look super easy.
Also, if you want to add a little lubrication, I discovered this stuff a few years ago. It’s a great lubricant for anything that slides, especially wood on wood and that pulley cord. I also use it on that stupid dishwasher door pulley spring thingy that starts to squeak after a couple years and my sliding door walls work like never before.
It’s a little pricey but one small jar should last a good long time.

6 Likes
I’ve got a spring reel type thingy on the upstairs bathroom window, and honestly I prefer sash weights. The springs resonate like unpleasantly mistuned guitar strings and it’s got more thermal bridging from the exposed metal.
But the one I’ve got is around 50 years old, so it might have been awesome 20 years ago, and you might be able to buy much better ones nowadays…
5 Likes