My kids are big fans of The Owl House so I made this door decoration for my son’s room:
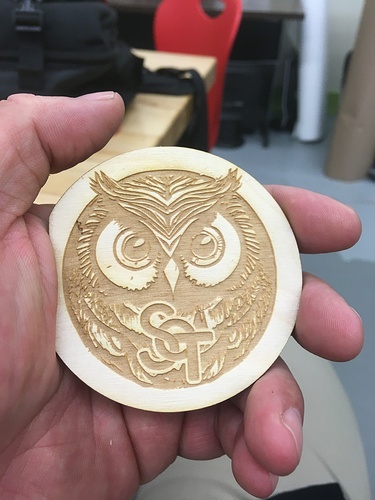
Also a batch of owl-themed coasters for… let’s say a summer camp.
Superb owls!
I don’t know if you’re going to make those benches but if you do I added some arm rests that finished them off nicely.
My wife kept sitting sideways to put her feet up plus she made some pillows so I looked at it for a while and came up with these. Just 2x4s rounded off with the router.
That’s my plan, yes. Last week’s fence panels threw me off. I’ve got a bookmark alarm for two weeks from today. I love the armrests. Great addition.
some updates.
we went back to the vent hood house after the hood had been stained and finished so now it matches the flooring and other wood in the house
the lady’s parents had a music store and she has some awesome old record players. I really wanted a picture of the stethoscope earphones this cylinder player used but they just moved in and she didn’t know where they were; there’s no loudspeaker, you can only listen with the stethoscope
the upper, louvered cabinet doors control the volume on this one
and this one is the coolest-looking
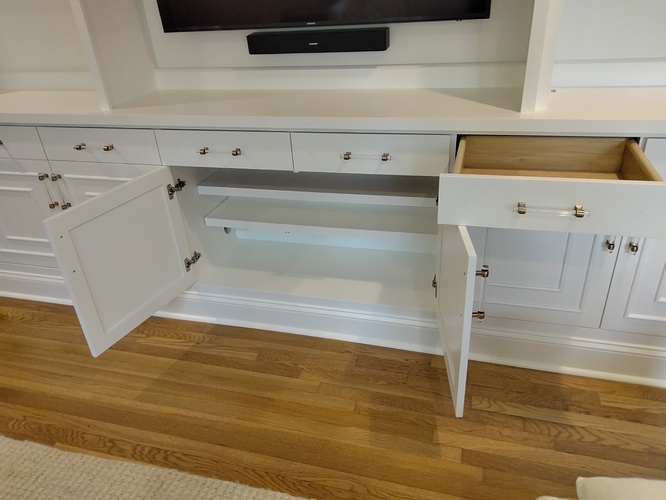
we went back to the big cabinet house to install the doors and drawer fronts after they got painted and to put the hardware on. it came out awesome
edit: the doors came plain shaker style from the millworks and we had to put a panel over the inset panel to raise it to the same plane of the frame and also do the double squares of trim on them. very difficult to get the exact sizes so the miters all lined up perfectly but we didn’t mind since the clients didn’t mind paying for the time to get what they wanted

(Hoping that @anon67050589 is correct and there really is an escape hatch for kitties still in that built-in ![]() )
)
Seriously, both the hood and the shelves/ cabinets look fabulous! You’re an artist!
again, my boss is the lead on all these projects but yeah I do half the work. the clients most always have pictures found online of what they want the project to look like.
but thank you!
Well, tell your boss that both of you are truly talented. The stained wood looks just like a copper finish!
and 180° opposite the previous post, here’s a no-budget , strictly utilitarian project I did for me.
I couldn’t screw the plastic thing to the house because I rent, so I rescued the first pressure treated post I could get from work. it’s a 6x6, a real bear. I had no post hole digger so I cut the bottom into a long point and pounded it in with a huge rock. it didn’t go in very straight and it wasn’t tall enough, I had to bend over to wrap the hose. worst of all, the post was just narrow enough that the edges of the plastic wrapped around the post so the whole thing deformed under the weight of the hose. I got some scraps from the next pressure treated project we did at work; added more length, and a backboard for the plastic to lay flat on.
the reason there’s burn marks is because I wanted to seal the end grain. it’s all pressure treated but the end grain still allows water ingress, particularly after getting bashed with a rock. so I melted wax over it but I wasn’t being very careful with the torch
to (partially, anyway) fix the straightness, I used the wedges of wood I made when I cut the post into a point and pounded them into the ground against the leaning sides of the post, a technique my boss showed me. it didn’t completely straighten it in this instance, but it was really crooked before. after the dirt settles some I can whack down the remaining parts, it should get even straighter.
fyi that’s Varnathane “espresso” stain with polyurethane over it
We’ve got a few grow bags but I didn’t like them just sitting on the new deck plus I was looking for an excuse to buy a circle jig for the router.
It was easy to use but using a router on fresh pressure treated plywood made lots wet sawdust.
I could also use a plunge router instead of the fixed base one I have. There’s still 2 shopping days before Father’s Day.
I set it up on my 40+ year old Black and Decker Workmate.
I would love to have a bandsaw large enough for resawing. I do not, and honestly would not have a place to put it if i did. What do have
Is a big ass rip saw, which does the job and provides a hell of a work out at the same time.
That is a 2 inch thick hickory board reclaimed from a barn tear down by my FIL probably 50 years ago. I turned 16 feet of 2x into 32 feet of 1x for a project which i will post when it looks like something. That is hard wood and does not treat tools nicely. Now i need to set aside some time to sharpen that big ass rip saw!
wow! no need to go to the gym during this project
A band saw is next on my list after a decent table saw.
All my big power tools are tucked off to the side and take longer to set up than to make one cut. But, I couldn’t make a straight cut with a hand saw if my life depended on it so they usually stay hung on the wall.
I’m amazed you could saw that all the way down in a straight line. Do you have thickness planer?
If you do I’m a gonna be jealous.
I do. After splitting the boards i run them through to clean up the saw marks. It is not easy, but there is an almost Zen happiness when the two halves fall apart. And then again while rubbing in the Icy-Hot!
I have a decent Sandvik rip saw, but it mostly hangs on the wall since I got my bandsaw. If I tried to make that cut, I would end up with material for some tapered shingles.
Do you have room in your back yard for a pit? (Hint: the upper position is preferred.)
I have my dad’s old Henry Disston rip saw. It’s a beast, with a 26" blade etched “The beauty, finish, and utility of this saw cannot be excelled”.
I have no idea of the make of mine. I found it in a junk store years ago. It has a label on the handle in German, and looks like a one-man crosscut saw, but definitely has a ripping tooth pattern. No clue, other than it is a hell of a lot faster cutting than most conventional looking rip saws.
I’m circling back to the projection idea I had a little while back for larger paintings…
I’ve found a few tutorials from makers who have made projectors from recycled materials and other junk, you only need the lens.
Does anyone possibly have an old, broken projector they don’t need or want anymore? Filmstrip, carousel, I don’t think it really matters just as long as the lens is intact. All I want is to be able to enlarge my base drawings into larger paintings. I don’t even need the projector, only the lens if it makes it easier to mail.


